How to Set Up and Encrypt an External SSD and Run Docker Images Externally
Docker is a powerful tool for developing, shipping, and running applications. It allows us to encapsulate our applications into containers, which then gives us the ability to run entire applications without the hassle of setting up our local machines with custom libraries and dependencies for each application. We use Docker ‘images’ to define the code, config files, environment variables, libraries, and run time that will execute in each container. This gives us the confidence that all of our development environments (as well as production, staging, etc.) will run exactly the same as each other and could potentially eliminate the all too common developer issue of “It worked on my machine, why doesn’t it work on yours?”.
While Docker is a valuable developer tool that increases efficiency in the software development life cycle, it also can be difficult to run on a resource-constrained machine such as a MacBook Pro with only 128 GB internal storage. Docker images can be huge, and it is not uncommon to see production-level applications have images well over 1 GB. When trying to work on multiple applications at once, the need for additional storage will almost certainly arise, especially on a computer with a small amount of disk space.
To mitigate this issue, we will walk through the process of setting up and encrypting a Samsung Portable SSD T5 on Apple macOS 10.15.7 to take on the workload of storing multiple Docker images without reducing perceived system performance while doing development work.
Setup and Encrypt Drive
The Samsung Portable SSD T5 is lightweight, fast, and comes with an encryption feature, but here we’ll opt to use the encryption built into macOS. If you are interested in learning about the inherent pattern of critical issues with SSD hardware encryption, see Security researchers have busted the encryption in several popular Crucial and Samsung SSDs.
Encryption at rest is a fundamental concept in data security and is taken very seriously at Rietta. We make sure the internal drives on our computers are encrypted as well as any external drives that may contain sensitive information. This way if anyone gets a hold of our drives they will not be able to access anything without our password and the data will remain secure. Additionally, by encrypting our drives before we put anything on them when the drive fails we can responsibly recycle it rather than resorting to physical destruction, a win for the environment as well.
Warning: This will completely erase the drive, so if you have anything stored on it be sure to back it up before following these steps.
Steps
1. Connect Your External Drive
Plug in your external drive, open Disk Utility, click view, and select Show all devices. This will give us access to the physical disk which we can then encrypt.
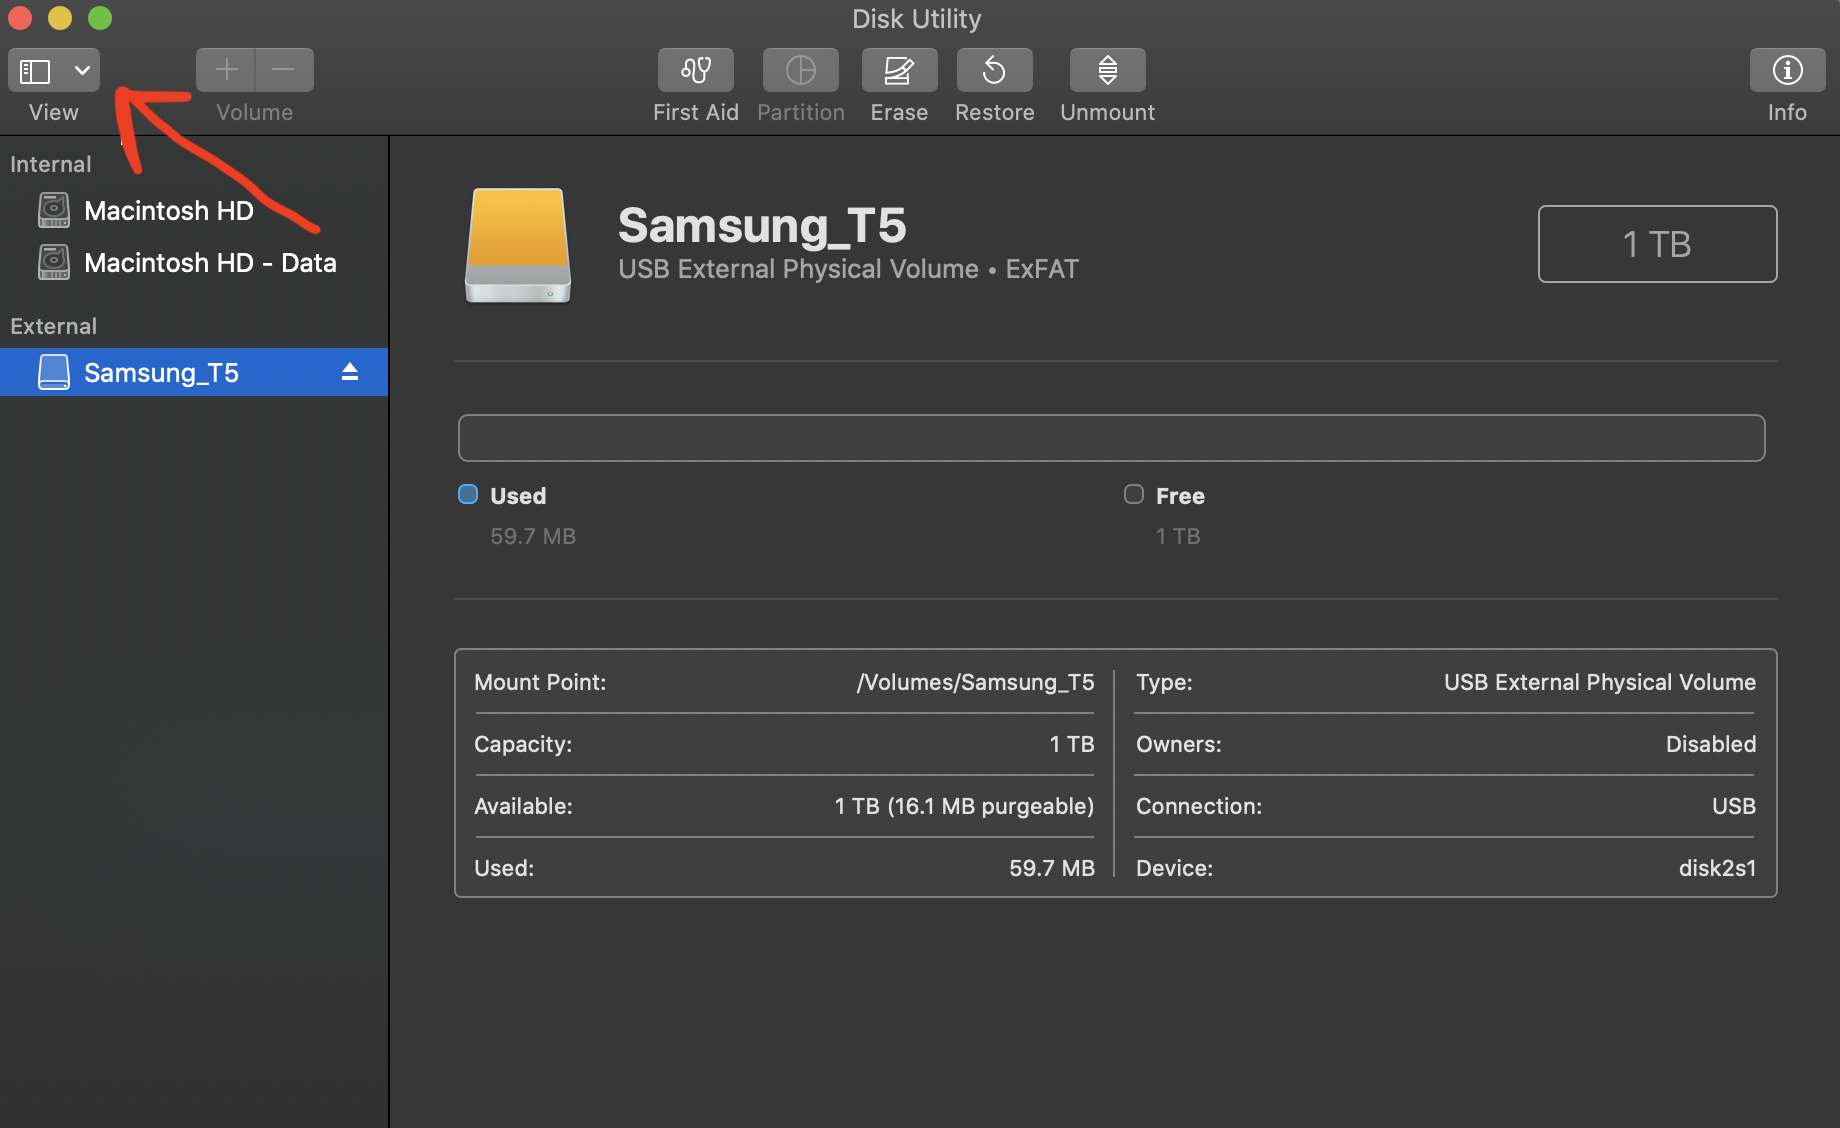
2. Show Hardware Device instead of Logical Volumes
Select the now visible Samsung Portable SSD T5 Media and click erase.
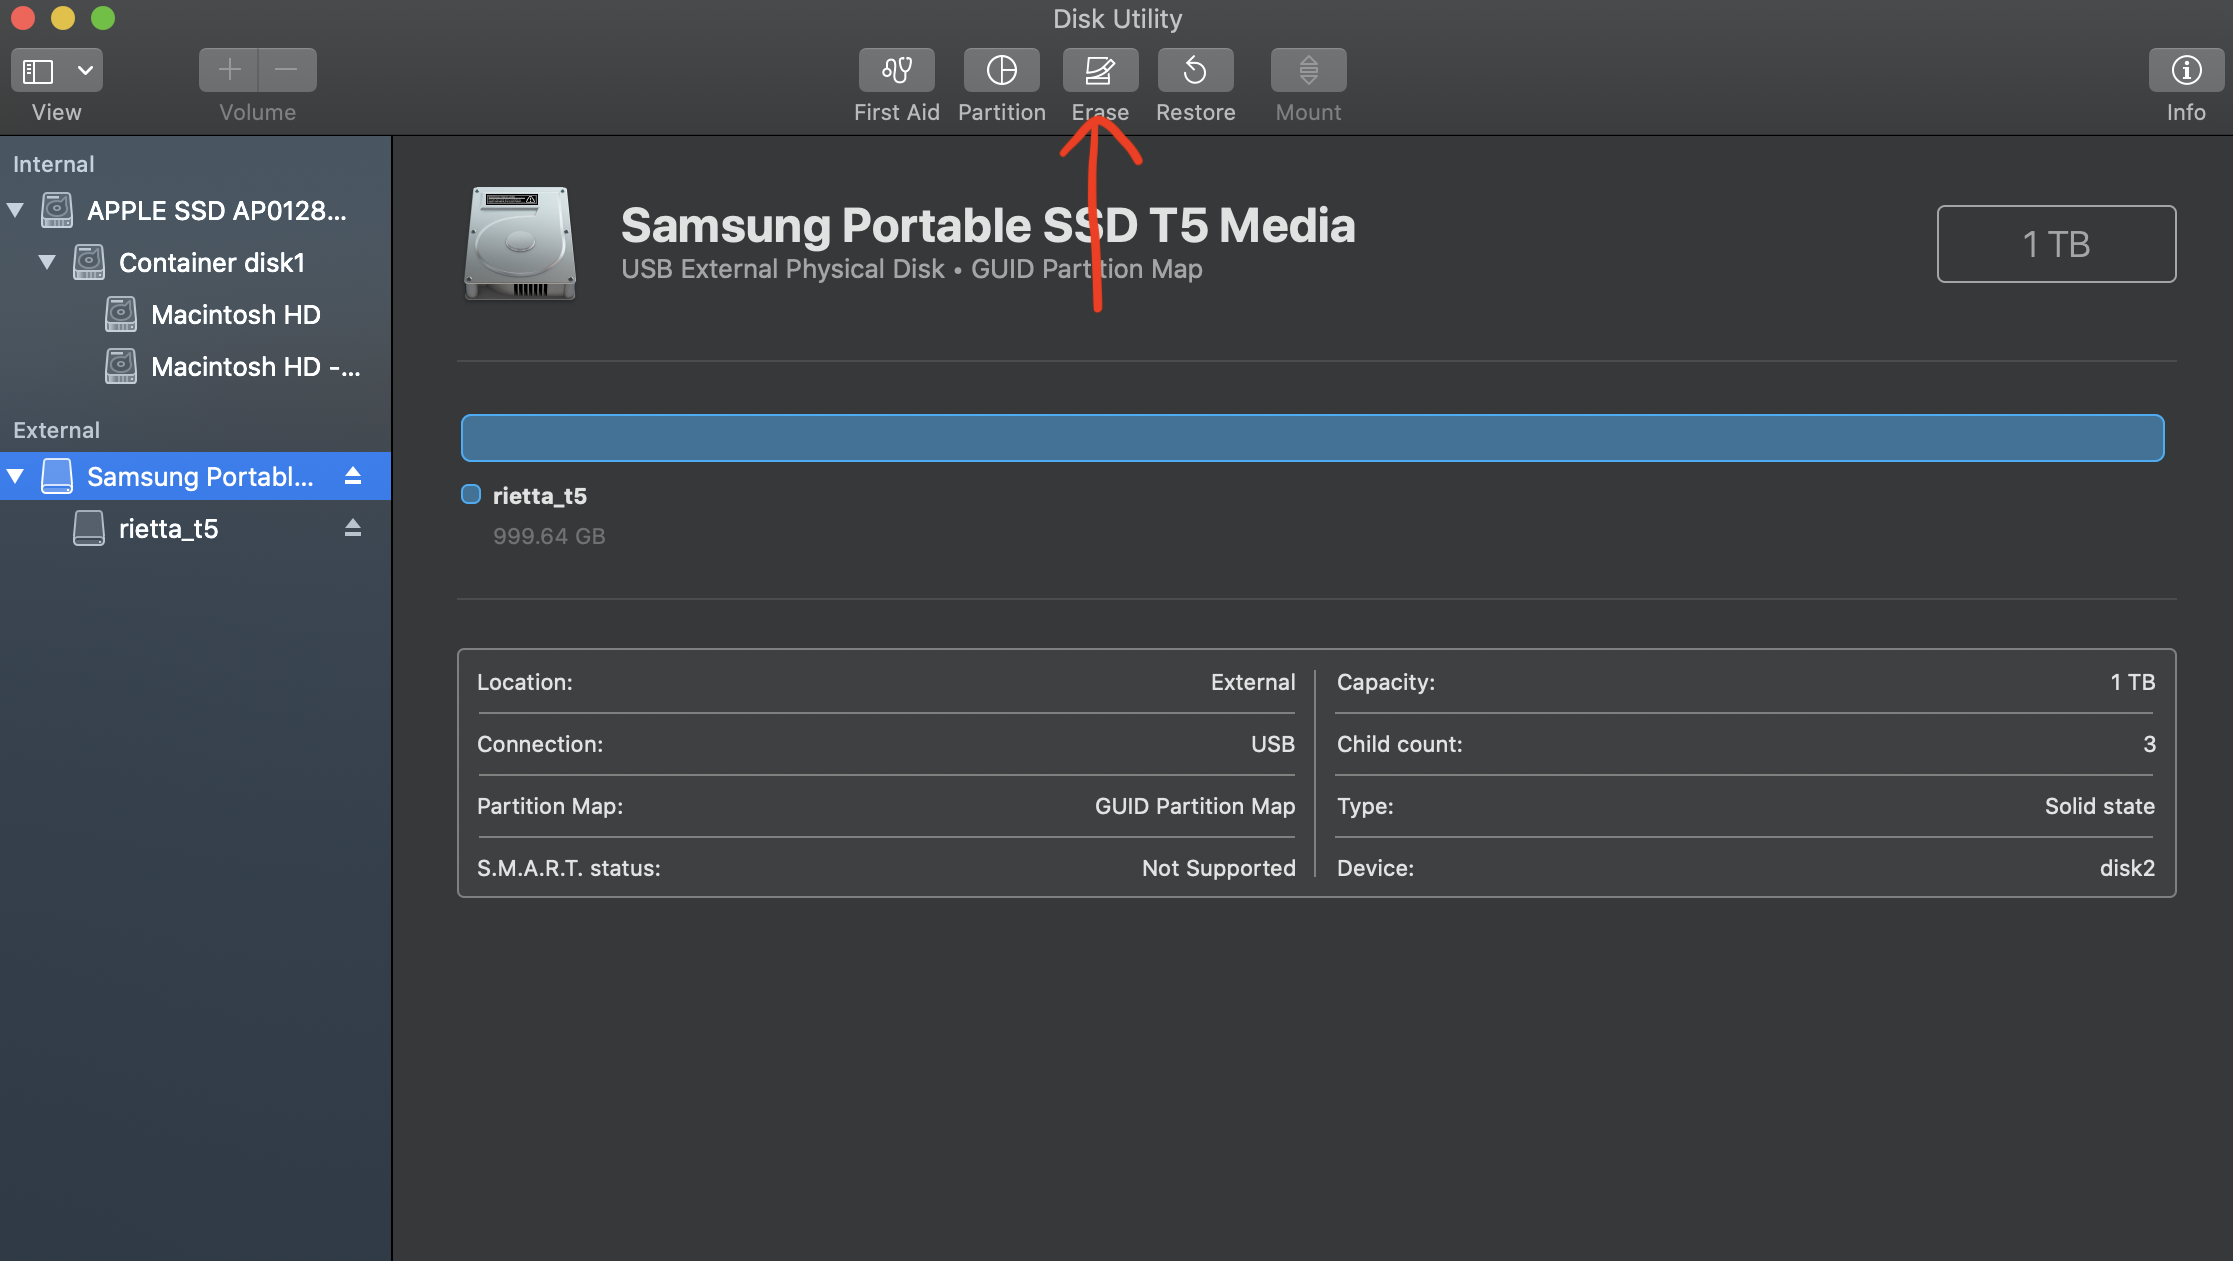
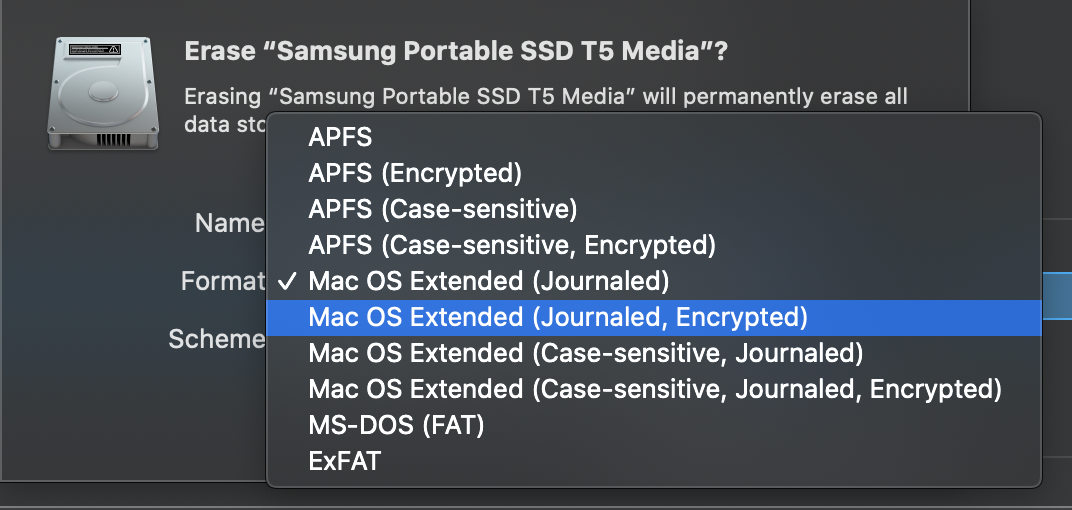
3. Partition Volume with a GUID Partition Map
This will open a popup that will allow us to rebuild the device with encryption enabled. Select GUID Partition Map under scheme. This is where the encryption options we are looking for will be located. For Format: select Mac OS Extended (Journaled, Encrypted).
4. Format the Drive as an Encrypted Volume
Click Erase and you should be prompted to create a password. For information on creating a secure password see Secure Passwords and Passphrases by Frank Rietta.
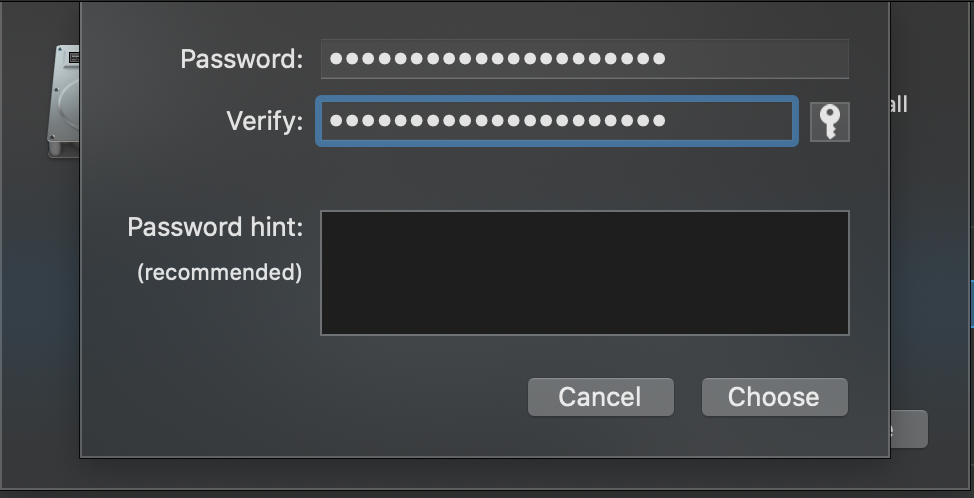
5. Unplug and Reconnect Your Drive and Confirm Password Unlocks It
Confirm your password and your external drive is now encrypted and ready to integrate with Docker.
6. Change Docker Disk Image Location
a. Create Folder for Docker Containers on Your External Drive
Navigate to the command line and make a Containers folder within your encrypted drive.
$ mkdir /Volumes/<name-of-SSD>/Containers
b. Open Docker Desktop Settings
Open Docker Desktop and select settings
Select Resources and scroll to the bottom. You should now see a field titled Disk Image Location
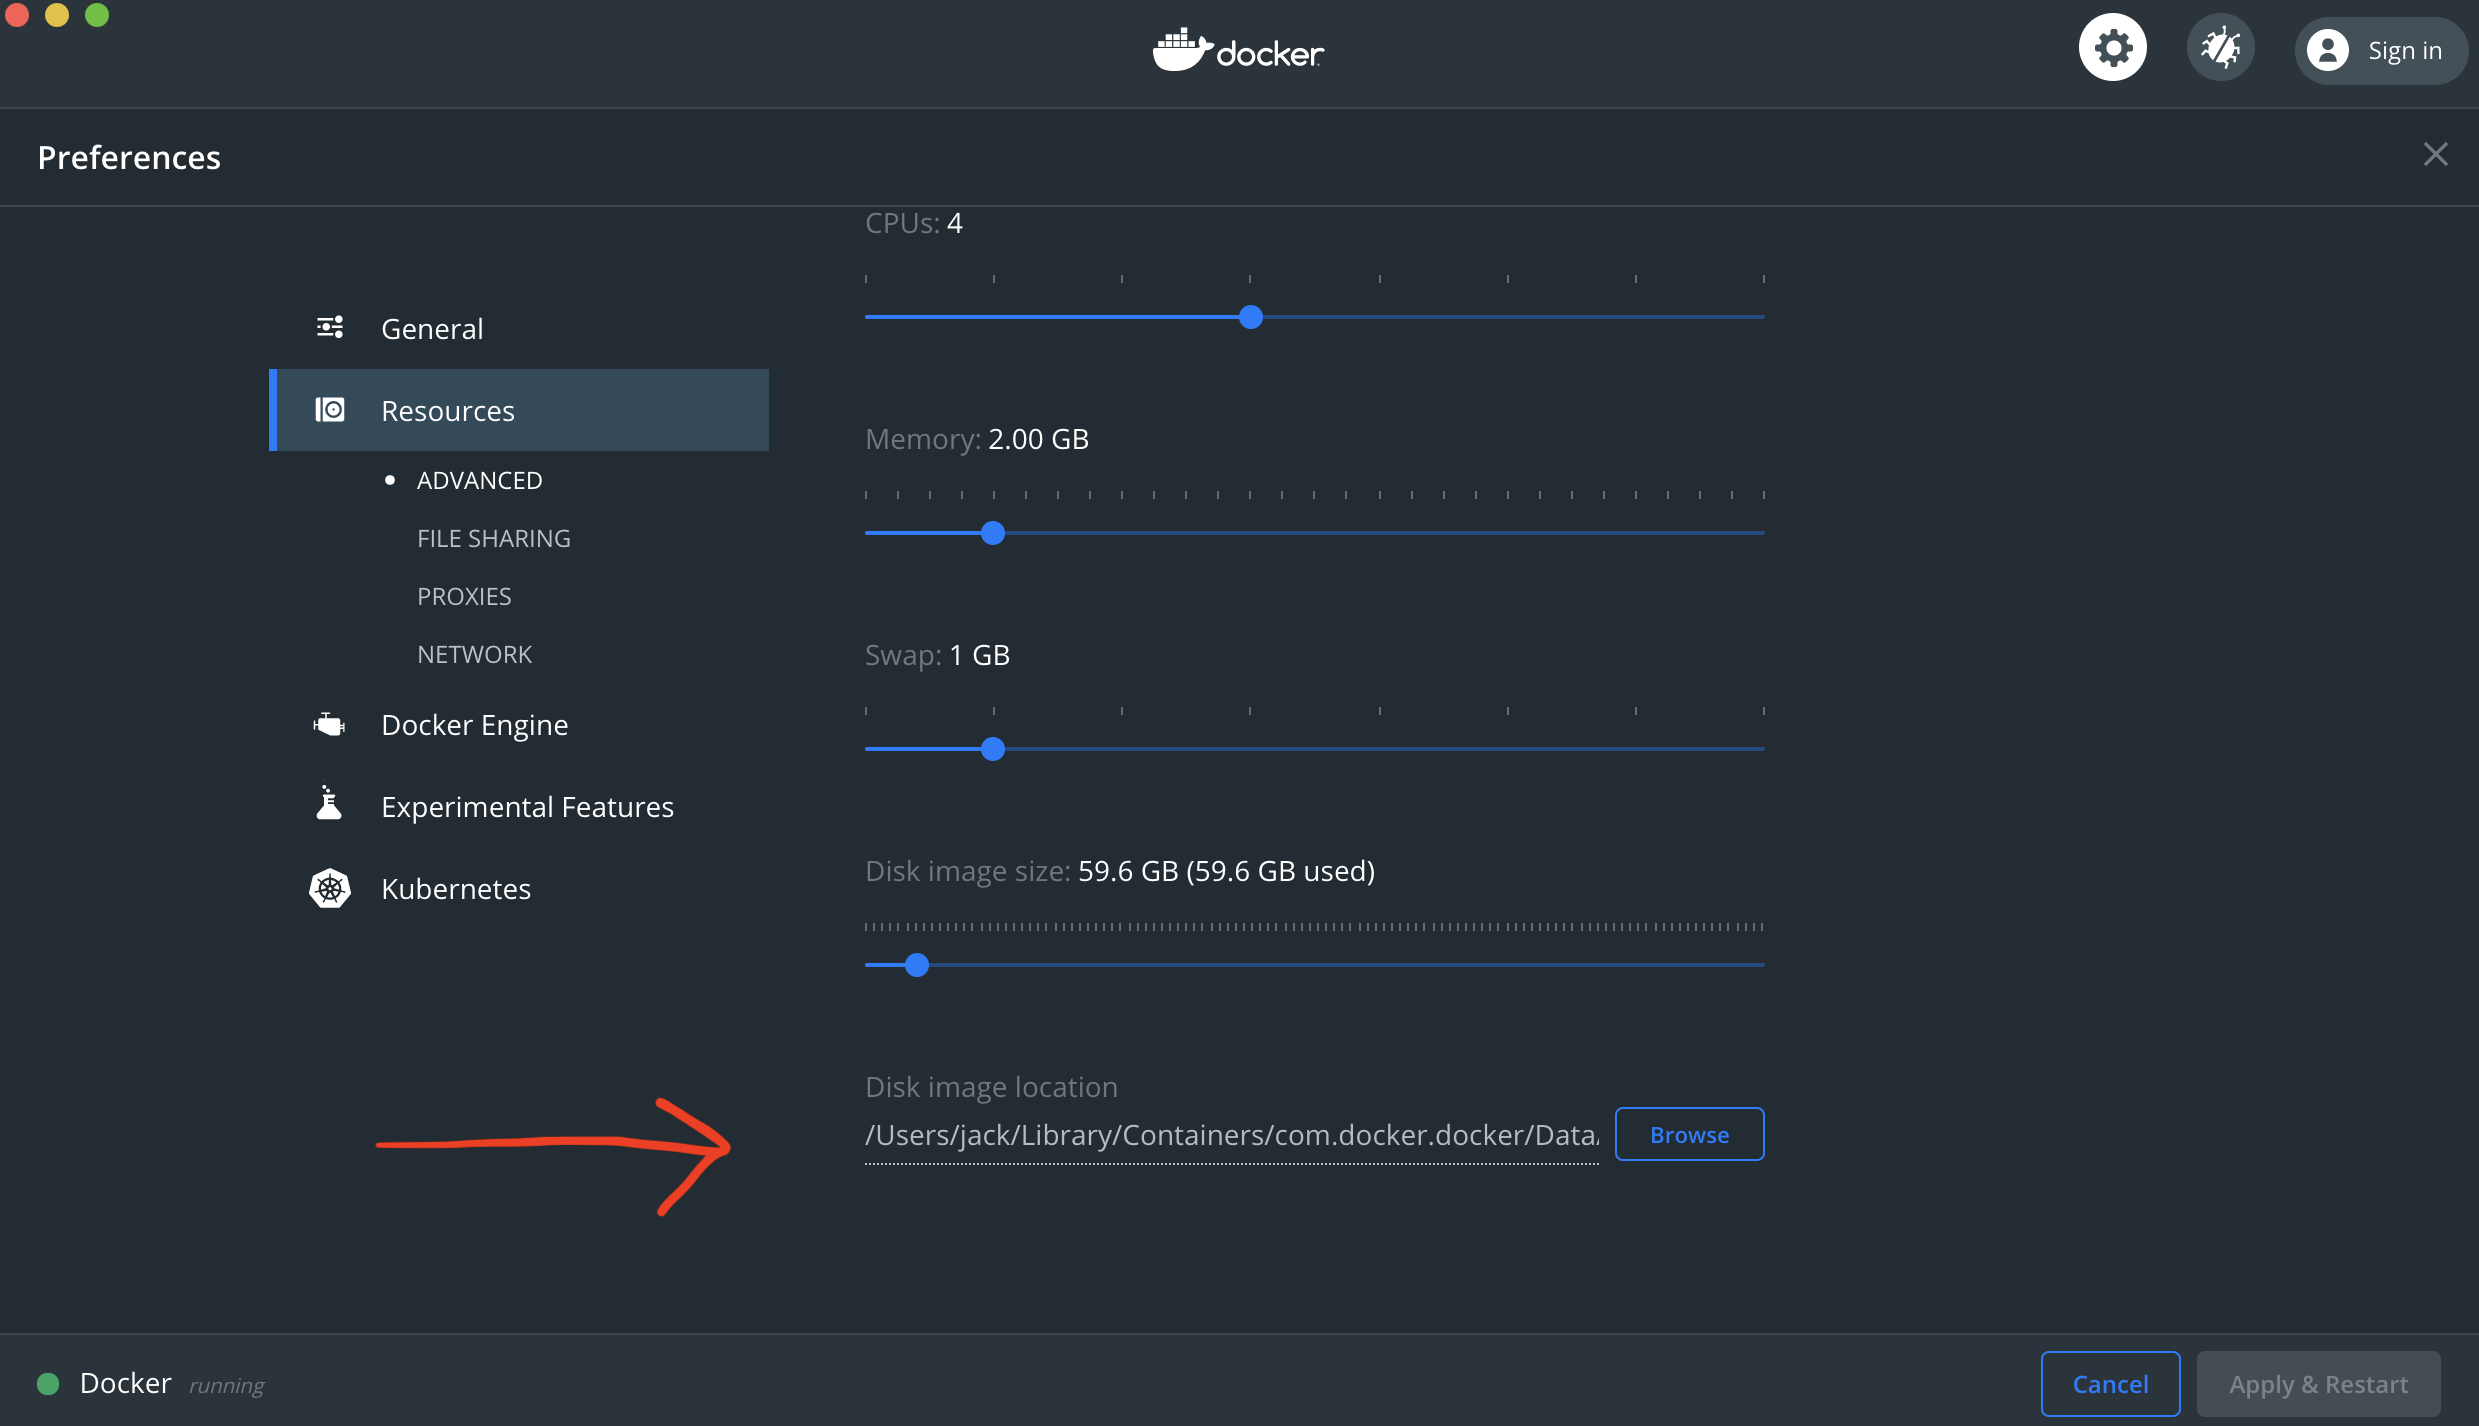
Click Browse and navigate to your encrypted drive. Select the Containers folder you just created.
Outcome
Docker will now store images in our encrypted drive, freeing up local storage, and giving us confidence that we can clone and run multiple production-level applications without worrying about local environment setup or disk space.